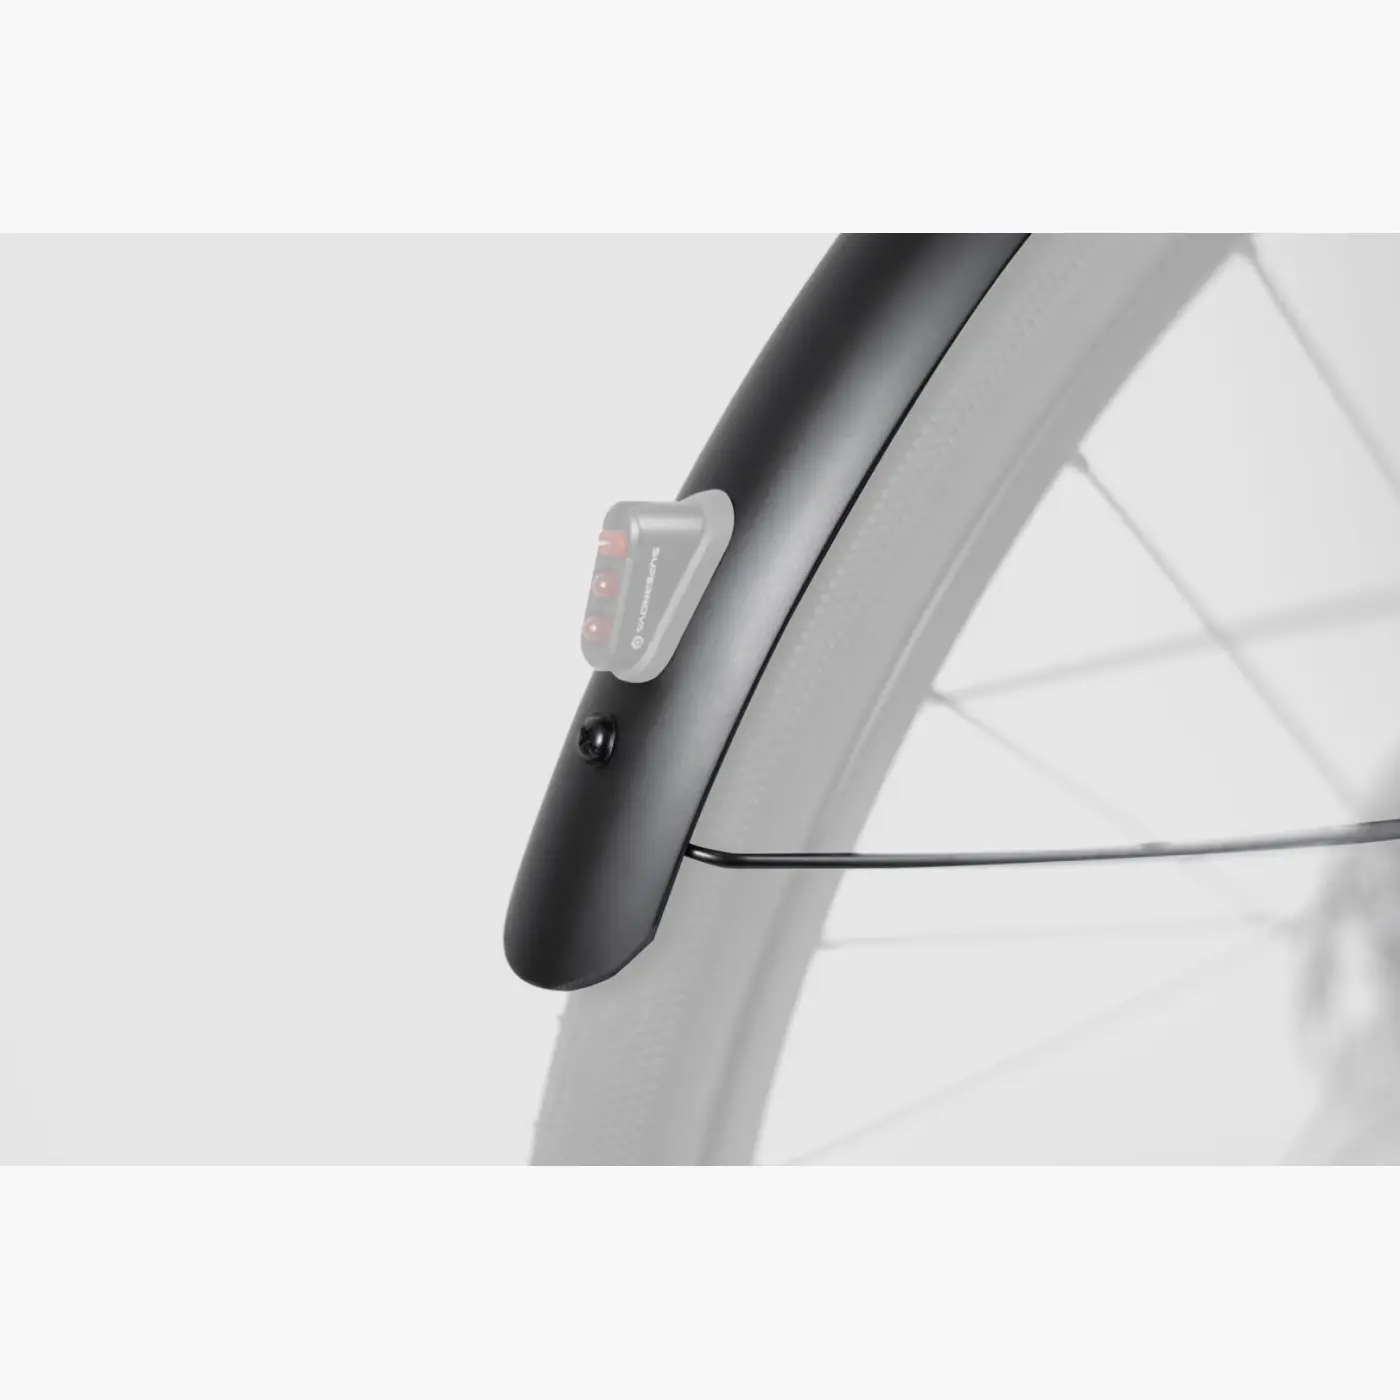
Replacing a damaged rear mudguard with light
To replace a damaged rear mudguard that carries the rear light: remove the damaged mudguard, cut the light cable leaving at least 20 cm from the frame, mount the new mudguard, refit the rear light, connect and insulate the cables, then test the rear light before riding.
Applies to
Section titled “Applies to”This guide applies to the Booda Bike mudguard set, rear-light version.
Tools needed
Section titled “Tools needed”- T25 Torx key
- T10 Torx key
- scissors
- wire stripping pliers
- heat-shrink tubing
- soldering equipment
- a drill, only if the mudguard hole does not line up
1. Remove the damaged mudguard
Section titled “1. Remove the damaged mudguard”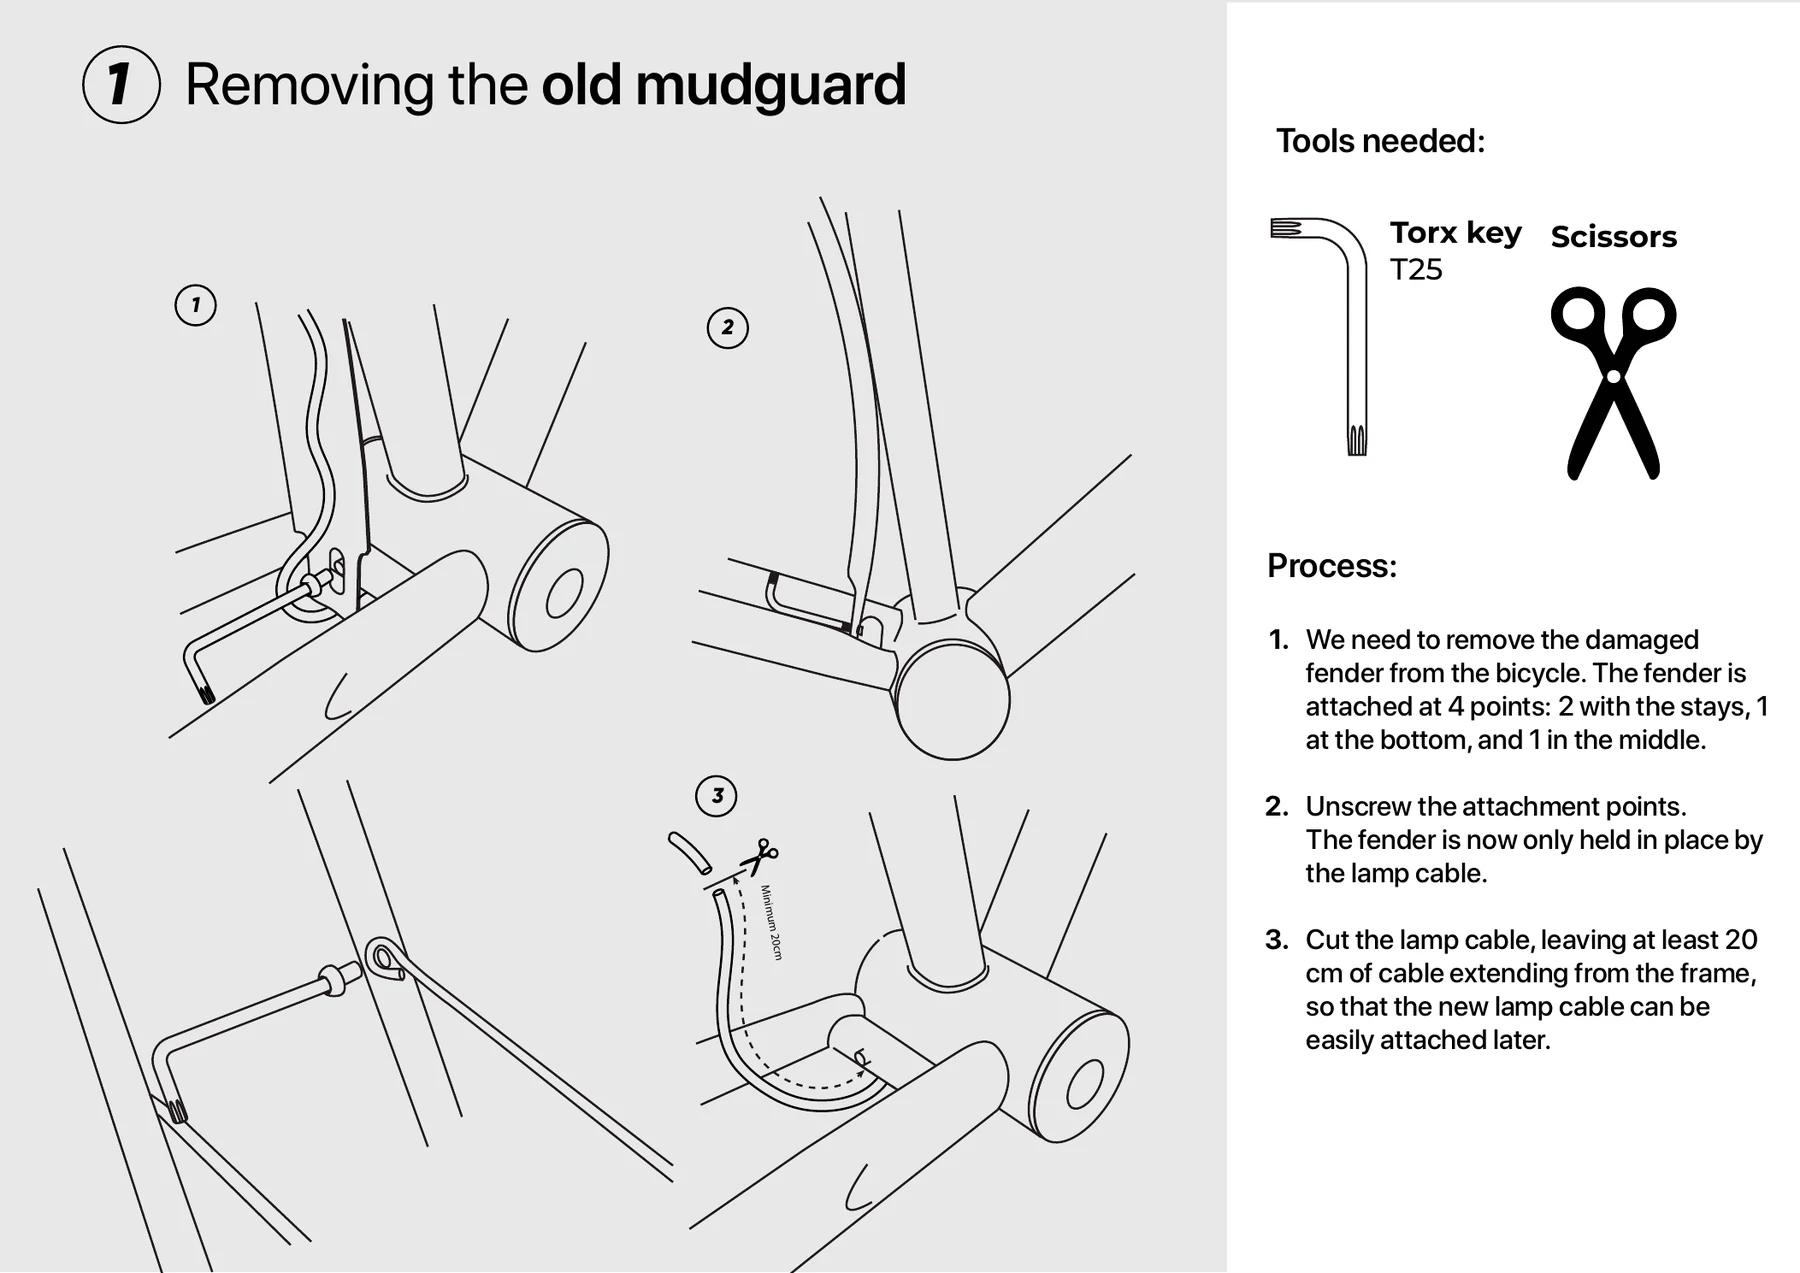
The rear mudguard is attached at four points:
- two mudguard stay attachment points
- one bottom attachment point
- one middle attachment point
Steps:
- Unscrew the attachment points with a T25 Torx key.
- Once the screws are out, the mudguard is still connected by the rear light cable.
- Cut the light cable.
- Leave at least 20 cm of cable coming out of the frame.
2. Position the new mudguard
Section titled “2. Position the new mudguard”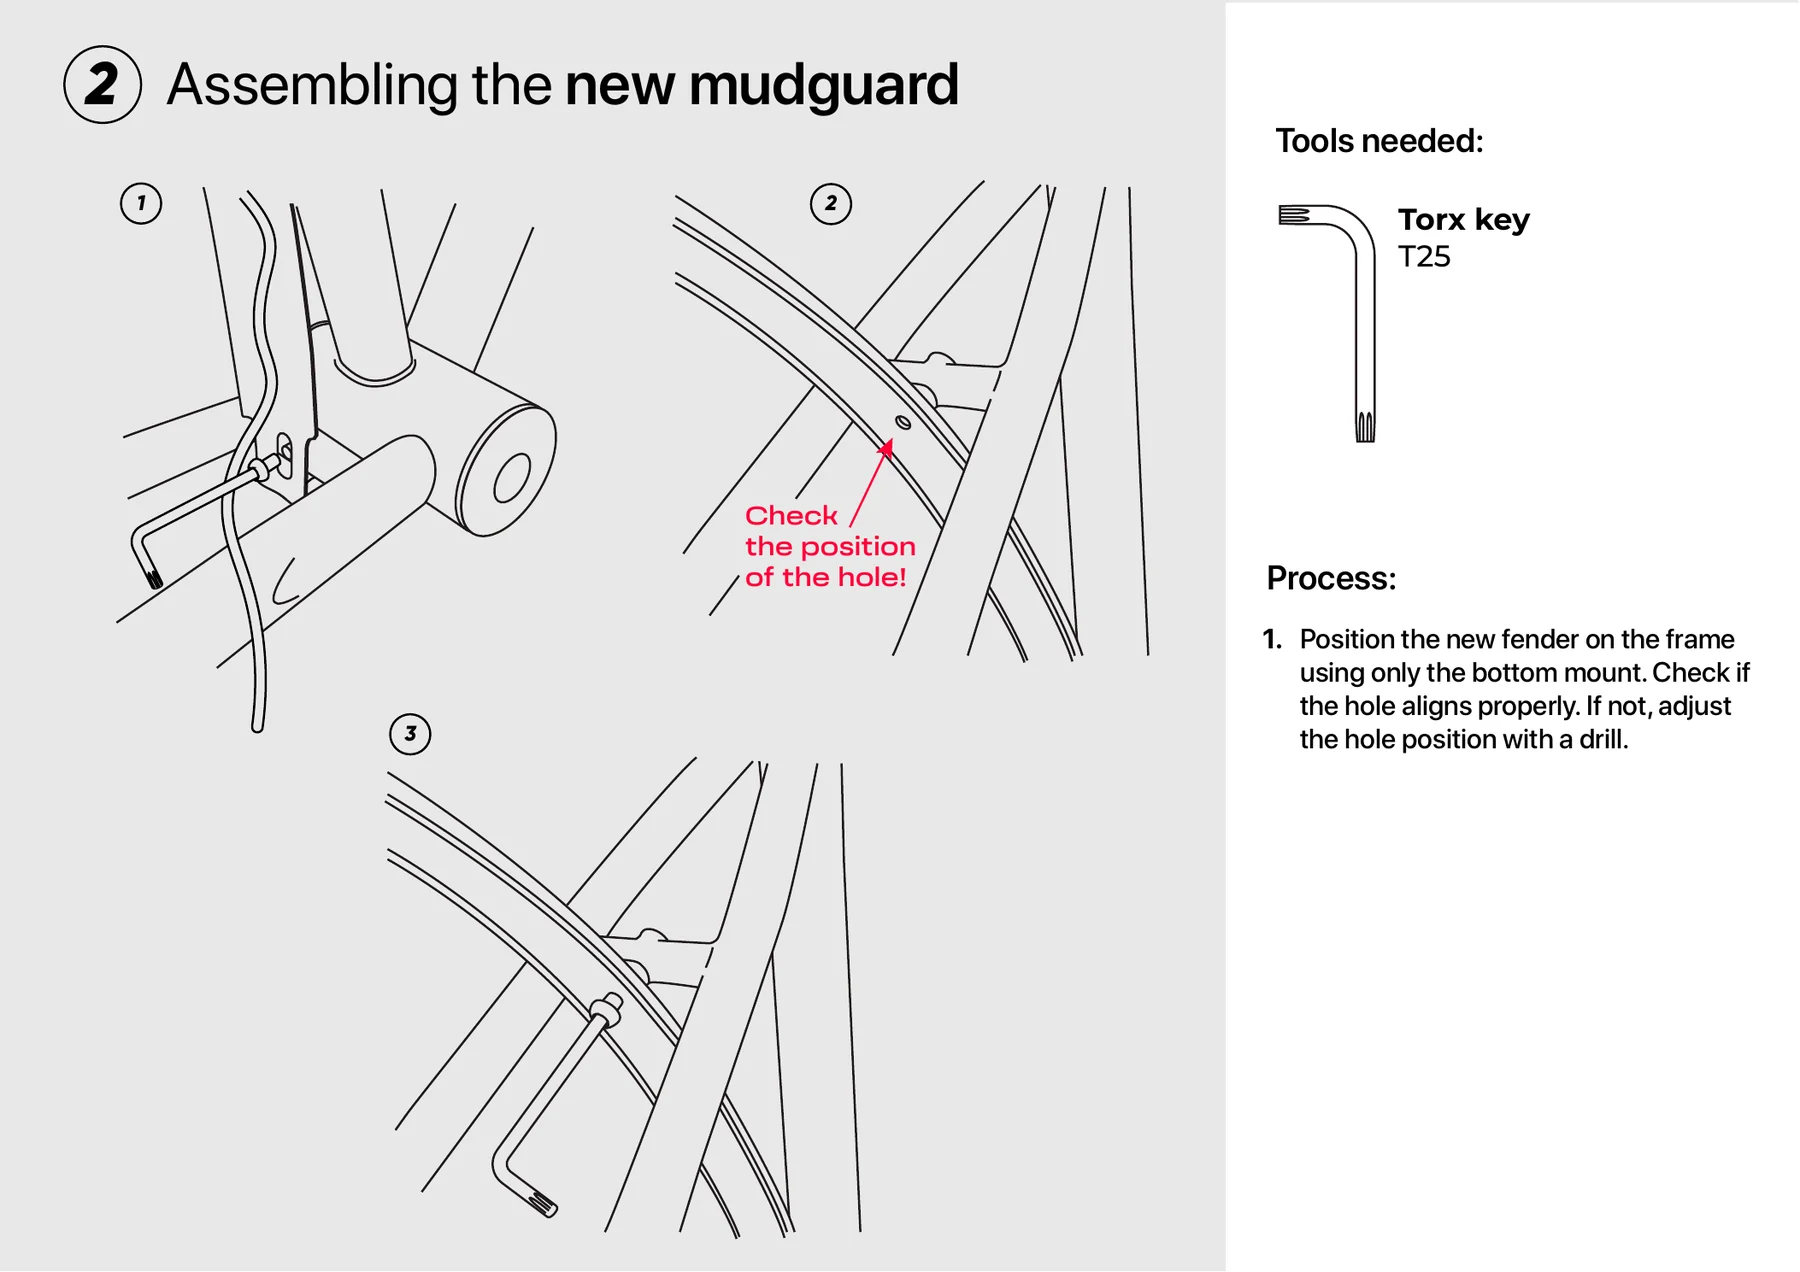
- Place the new mudguard on the frame using only the bottom mount.
- Check whether the mounting hole lines up.
- If it does not, correct the hole position with a drill.
3. Mount the rear light
Section titled “3. Mount the rear light”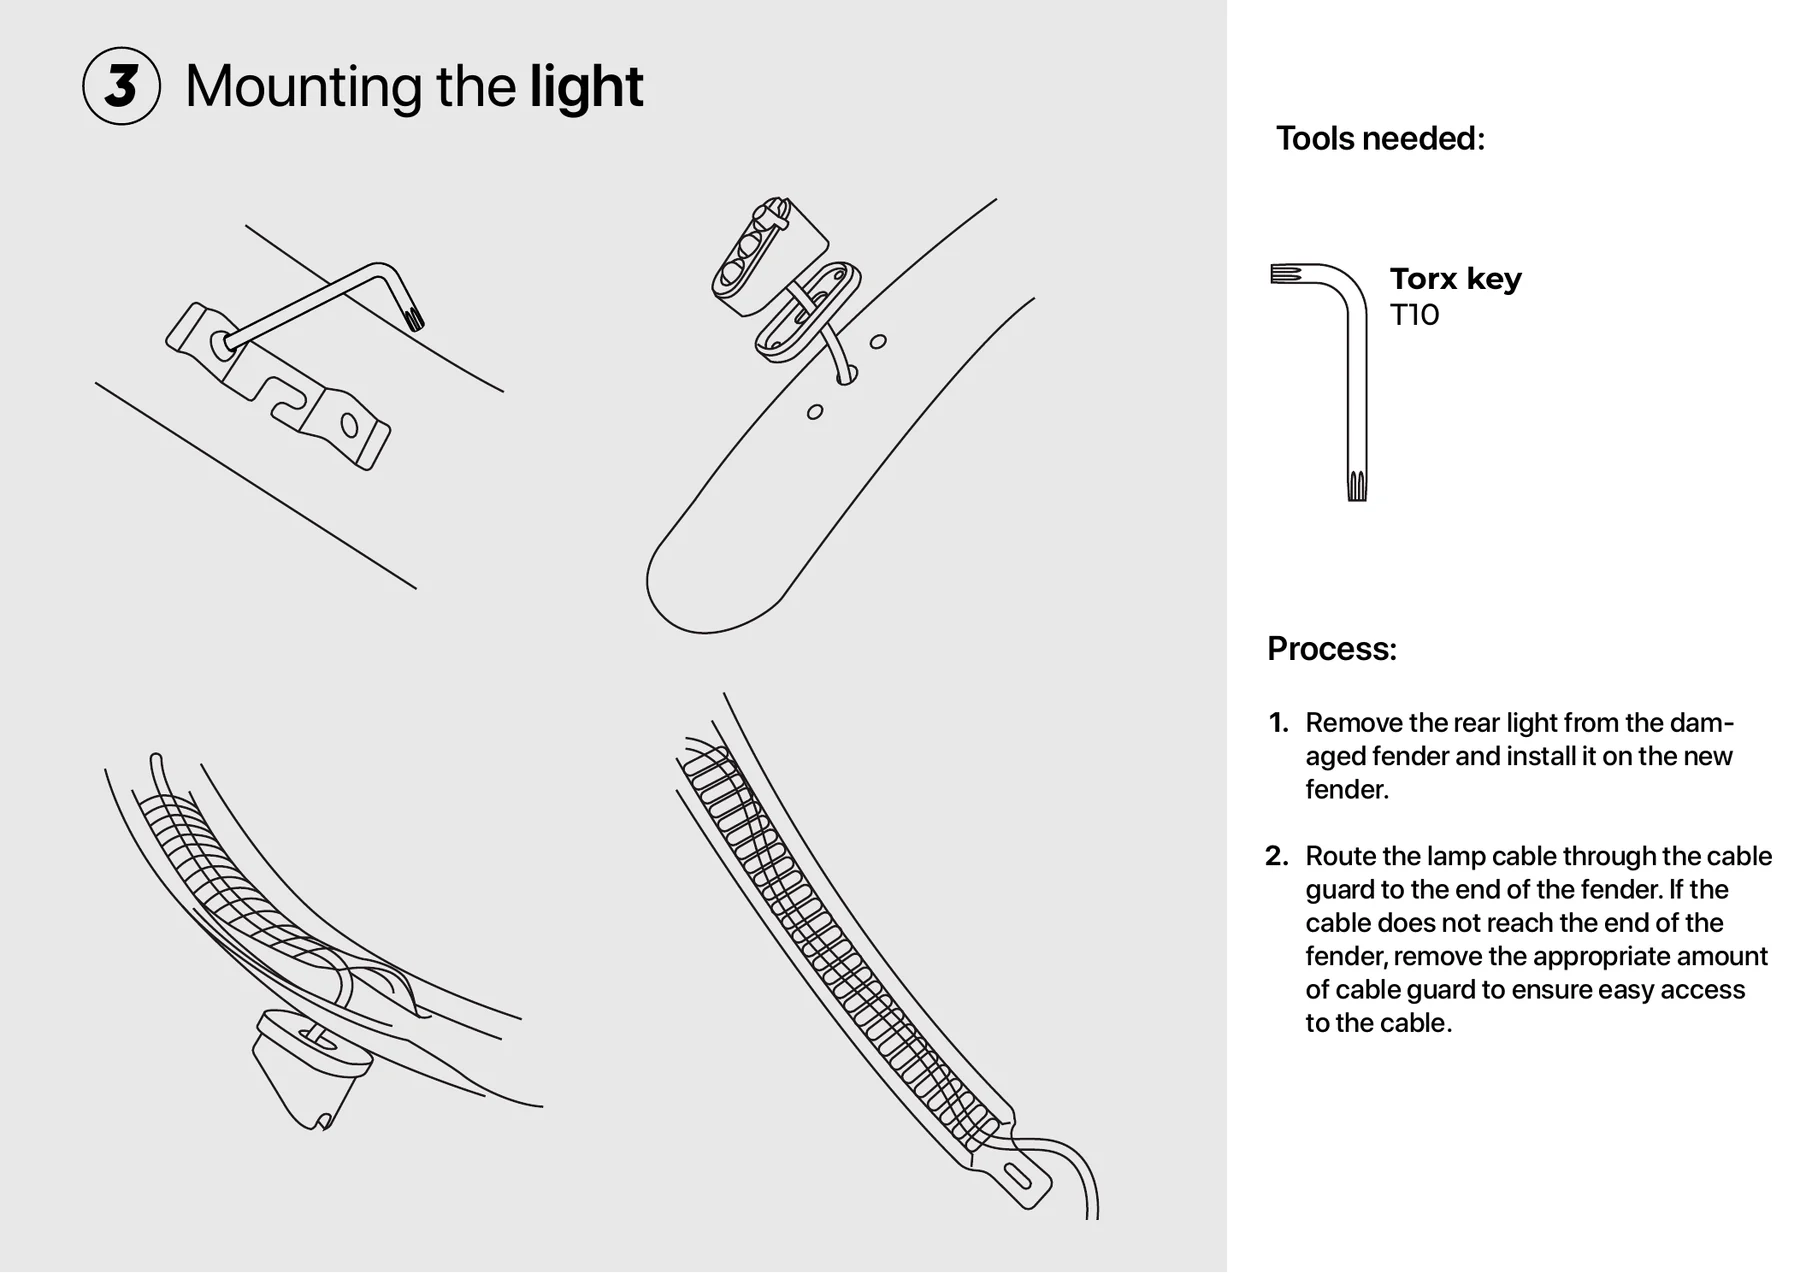
- Remove the rear light from the damaged mudguard with a T10 Torx key.
- Fit the rear light on the new mudguard.
- Route the light cable through the cable guide toward the end of the mudguard.
- If the cable does not reach the end of the mudguard, remove only as much of the cable guide as needed to reach the cable easily.
4. Mount the new mudguard on the bike
Section titled “4. Mount the new mudguard on the bike”- Mount the mudguard on the bike.
- Secure the bottom mount, the middle mount and the mudguard stays.
- Check that the mudguard sits correctly over the wheel.
- Check that the mudguard does not rub the tire.
5. Connect the rear light cables
Section titled “5. Connect the rear light cables”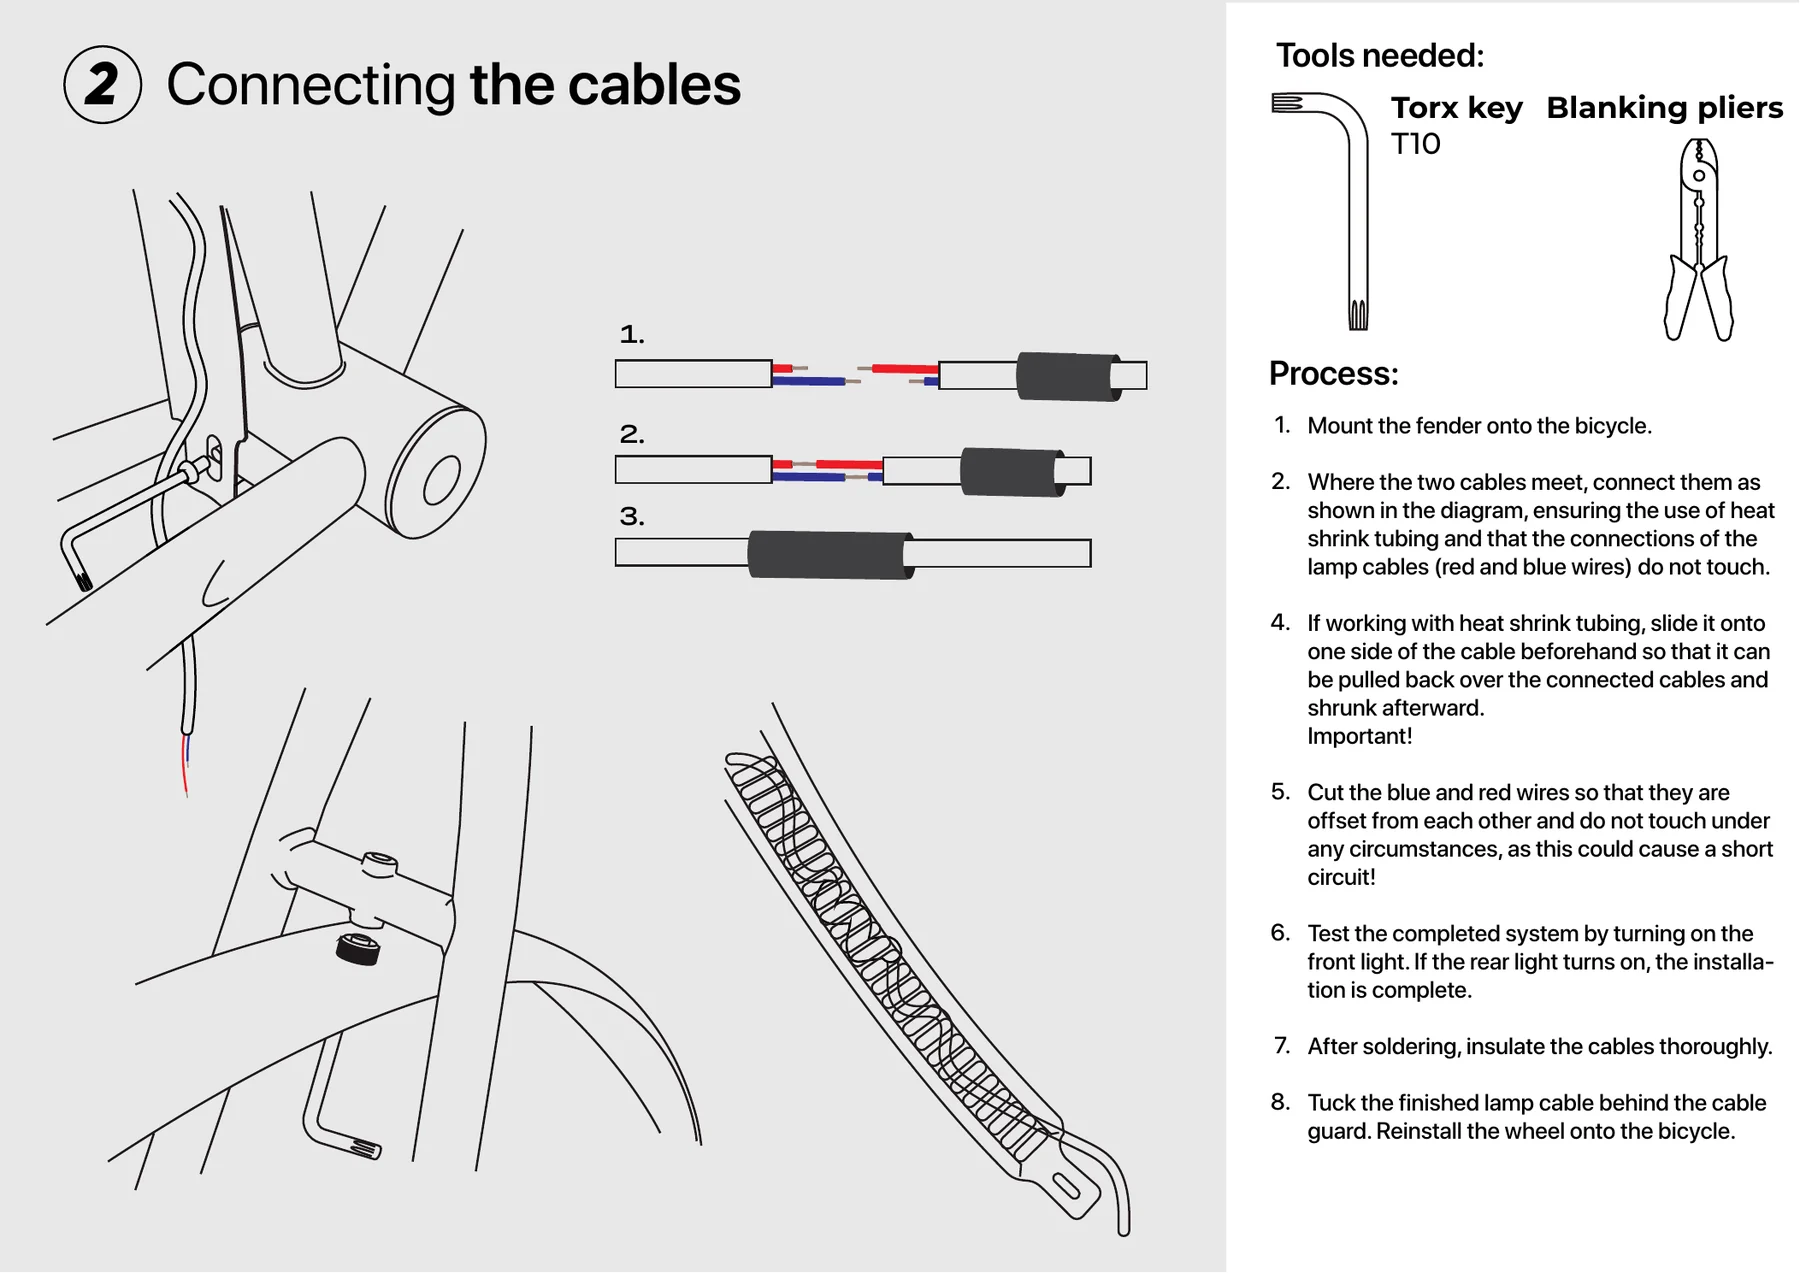
- Find the point where the frame cable and the rear light cable meet.
- Slide heat-shrink tubing onto one side of the cable before connecting the wires.
- Connect the light cables as shown in the original wiring diagram.
- Make sure the red and blue wire connections cannot touch each other.
- Cut the red and blue wires so that their connection points are offset from each other.
- Solder the connections.
- Pull the heat-shrink tubing over the connections.
- Shrink the tubing.
- Insulate the cables thoroughly.
6. Test the rear light
Section titled “6. Test the rear light”- Switch on the front light.
- Check whether the rear light comes on.
- If it does, the electrical connection is complete.
- If it does not, do not ride in low light until the problem is fixed.
7. Final safety check
Section titled “7. Final safety check”Before riding, check that:
- the mudguard is secure
- the rear light is secure
- the rear wheel is correctly fitted
- the mudguard does not rub the tire
- no cable can touch the tire, spokes, brake rotor or belt
- the rear light comes on when the front light is switched on
Spin the rear wheel by hand before riding. If anything rubs, moves or feels loose, do not ride the bike.
When to contact us
Section titled “When to contact us”Contact us if:
- the mudguard mounting holes do not line up
- less than 20 cm of cable remains from the frame
- the rear light does not come on after connecting
- the wires or the insulation are damaged
- the mudguard rubs the tire
- you are unsure about soldering, drilling or refitting the wheel