Belt tension: checking and adjusting
Correct tension keeps the belt from skipping and protects the bearings. On a Booda the belt is tensioned with the eccentric bottom bracket (EBB): rotating it moves the crank axle slightly forward or back, which changes the distance to the rear wheel. The rear dropouts are vertical and are not used for tensioning.
Why the value matters
Section titled “Why the value matters”Too little tension lets the belt teeth slide over the teeth of the rear sprocket. This is called skipping or ratcheting. It is not just noise: ratcheting can damage the carbon cords and make the belt unusable.
Too much tension can damage the bearings in the rear hub, makes the drive drag, increases wear across the whole drive, and raises the load on the bottom bracket bearings.
Target values
Section titled “Target values”Gates specifies belt tension as the frequency (in Hz) at which the belt span vibrates when plucked.
| Booda models | Hub | Smooth, steady pedalling | Punchy, rough pedalling |
|---|---|---|---|
| Pilot, Atlas, Sander, Astro, Player S | single speed | 45–60 Hz | 60–75 Hz |
| Banker, Hiker, Pulse, Alpine (Rohloff, Alfine and 3x3 versions) | internal gear hub | 35–50 Hz | 35–50 Hz |
For gear hubs the same range applies to both riding styles. Gates calls these values a starting point, which may need adjusting for rider size, gear ratio and pedalling force. If you are unsure which end of the range suits you, ask us.
A new belt: 50% green, 50% yellow
Section titled “A new belt: 50% green, 50% yellow”A new belt does not keep its initial tension: the carbon fibre settles once after fitting, and the tension drops. A new belt is therefore tensioned slightly tighter at first: on the Gates tension tester, the reading should show 50% green and 50% yellow. After this one-time settling, the belt should sit in the green.
Checking the tension
Section titled “Checking the tension”For checking at home we recommend the Gates UT Spring Tension Tester. Follow the instructions supplied with the tester and read the colour indicator:
| Colour | Meaning | What to do |
|---|---|---|
| Red | Tension too low | Increase the tension |
| Green | Tension correct | Nothing |
| Yellow | Tension too high | Reduce the tension |
A reading close to the edge of the green range is still acceptable.
We do not recommend measuring with the Gates smartphone app: it measures the plucked belt through the phone’s microphone and can be inaccurate. A workshop measures the frequency in Hz with a sonic tension meter.
Whichever tool is used, the reading is only valid if it is taken properly:
- Measure in the middle of the belt span.
- Turn the cranks a quarter turn and measure again.
- Take at least three readings, and go by the average rather than a single value.
Some variation between crank positions is normal, because tension varies slightly along the belt. If the readings vary widely, contact us: the cause is then usually not the tension.
Adjusting with the eccentric bottom bracket
Section titled “Adjusting with the eccentric bottom bracket”Only adjust when the tester shows the belt outside the green range. The video above shows the eccentric bottom bracket being set on a Booda.
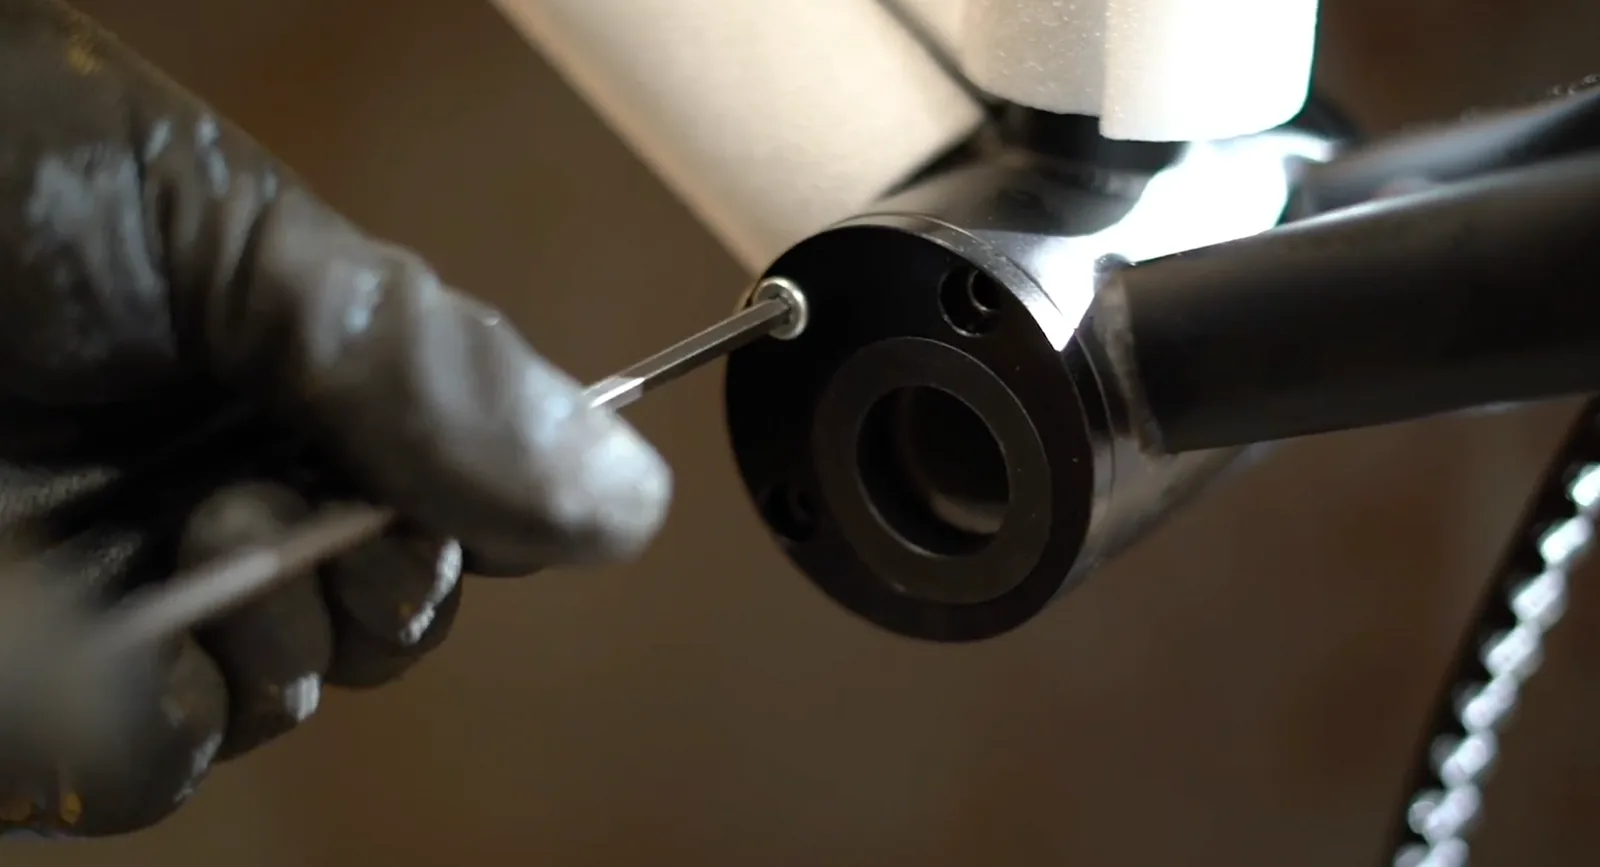
- Mark the current position of the eccentric cap against the frame, for example with a thin marker line. This lets you see how far you have turned it, and lets you return to the starting point.
- Loosen the 3 bolts on the non-drive-side eccentric bottom bracket cap with a 4 mm Allen key. Loosen them just enough for the eccentric to turn.
- Rotate the eccentric with the Booda Bike eccentric BB tool, in small steps. Turning it so that the crank axle moves away from the rear wheel increases the tension; turning it towards the rear wheel reduces it.
- Check the tension after each small step, as described above.
- Tighten the 3 bolts evenly to a maximum of 5 Nm.
- Check the tension again after tightening, because tightening can move the eccentric slightly.
- Check the belt line: turn the cranks 10–15 times and watch the belt run on both sprockets. See Belt alignment.
After removing the rear wheel
Section titled “After removing the rear wheel”Because the dropouts are vertical and the tension is set at the bottom bracket, removing and refitting the rear wheel does not change the tension, as long as the axle sits fully in the dropouts and is tightened properly. Check the tension and the belt line anyway before your first ride.
Rohloff models
Section titled “Rohloff models”On bikes with a Rohloff hub, “slipping gears” or a loud metallic noise is almost always low belt tension, not a hub fault. Booda builds its Rohloff models without a snubber; the tension is what keeps the belt on the teeth. See Why a Rohloff Booda has no snubber.
How tight should the belt on my Booda be?
Gates specifies 35–50 Hz for gear hubs (Rohloff, Alfine, 3x3) and 45–60 Hz for single speed with a smooth riding style, 60–75 Hz with a punchy one. On the Gates tension tester the belt should read green; a newly fitted belt is set to 50% green and 50% yellow because it settles once.
My belt skipped over the teeth. Can I keep riding?
No. Skipping (ratcheting) can damage the carbon cords inside the belt, and a damaged belt can fail suddenly. Gates’ rule is to replace a belt that has ratcheted before it is used again. Stop riding and have the tension and the belt checked.