
Unboxing and first assembly for gear hub equiped bikes
After unboxing your Booda Bike, install the seatpost, handlebar, pedals, front light, front wheel, and front mudguard if included. Before riding, check that the steering, brakes, front axle, pedals, lights, and mudguards are secure.
Important when receiving the package
Section titled “Important when receiving the package”If the package is damaged at delivery and the product inside may also be damaged, ask the courier for a damage report and take a photo of the box at the moment of receipt. The photo should clearly show the damage.
Returning the package
Section titled “Returning the package”Keep the box and packaging if you may want to use your right of return. We can only accept the bicycle if it is packaged properly to prevent damage during transport.
For packaging instructions, refer to the appropriate page in the user manual.
Before you start
Section titled “Before you start”Keep the box and packaging until the bike is fully checked.
Your bike is packed compactly for shipping. The following parts may be removed for transport:
- pedals
- seatpost with saddle
- front wheel
- handlebar
- front mudguard, depending on the model
The Carbon Drive belt system should stay in its original position.
Tools needed
Section titled “Tools needed”- 4 mm Allen key
- 6 mm Allen key
- T25 Torx key
- torque wrench, recommended
1. Install the seatpost
Section titled “1. Install the seatpost”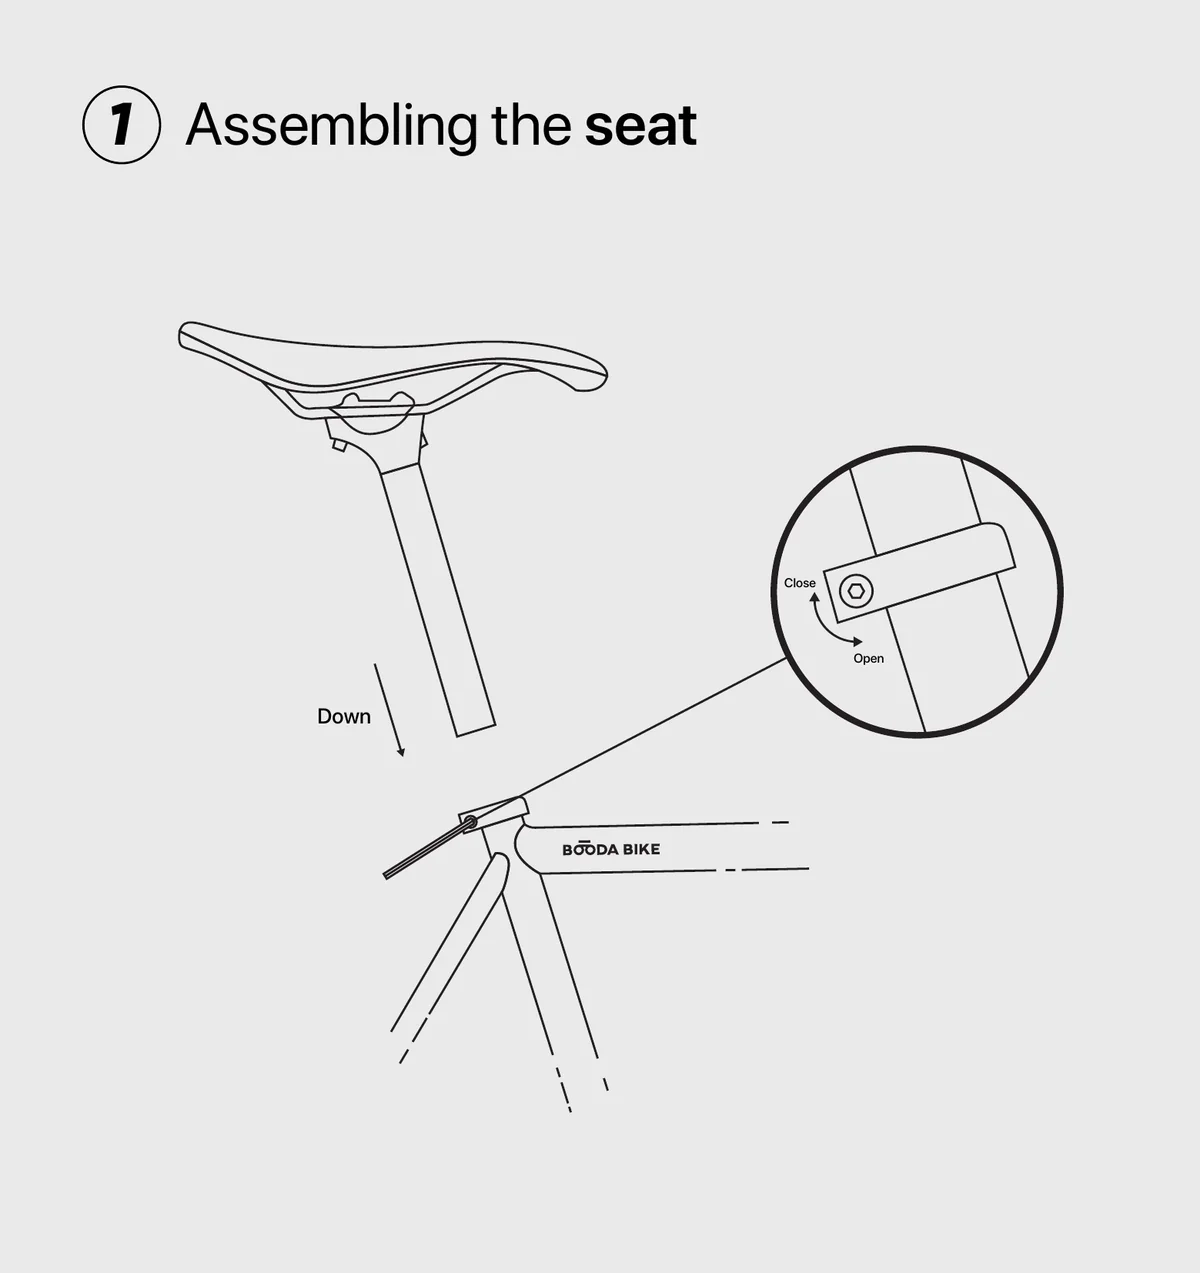
- Insert the seatpost into the seat tube.
- Adjust the saddle to the correct height.
- Tighten the seatpost clamp bolts.
Maximum torque: 6 Nm
2. Install the handlebar
Section titled “2. Install the handlebar”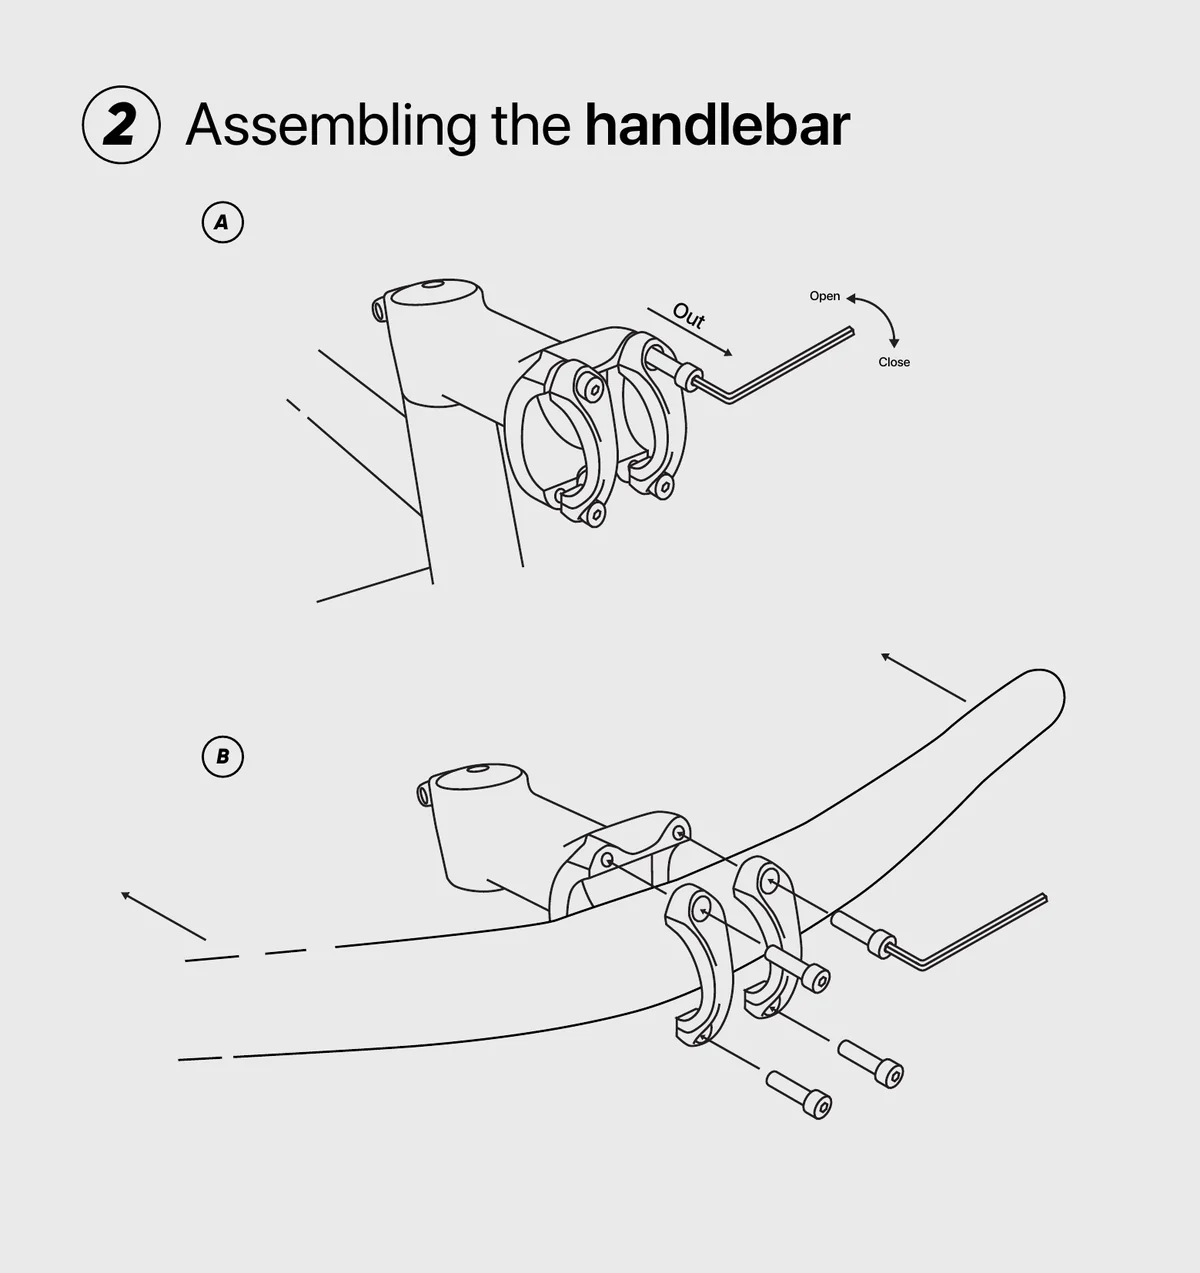
- Loosen and remove the 4 bolts from the handlebar clamp.
- Place the handlebar into the stem clamp.
- Put the clamp pieces back on.
- Tighten the 4 bolts gradually and evenly.
Maximum torque: 5 Nm
3. Set the handlebar angle
Section titled “3. Set the handlebar angle”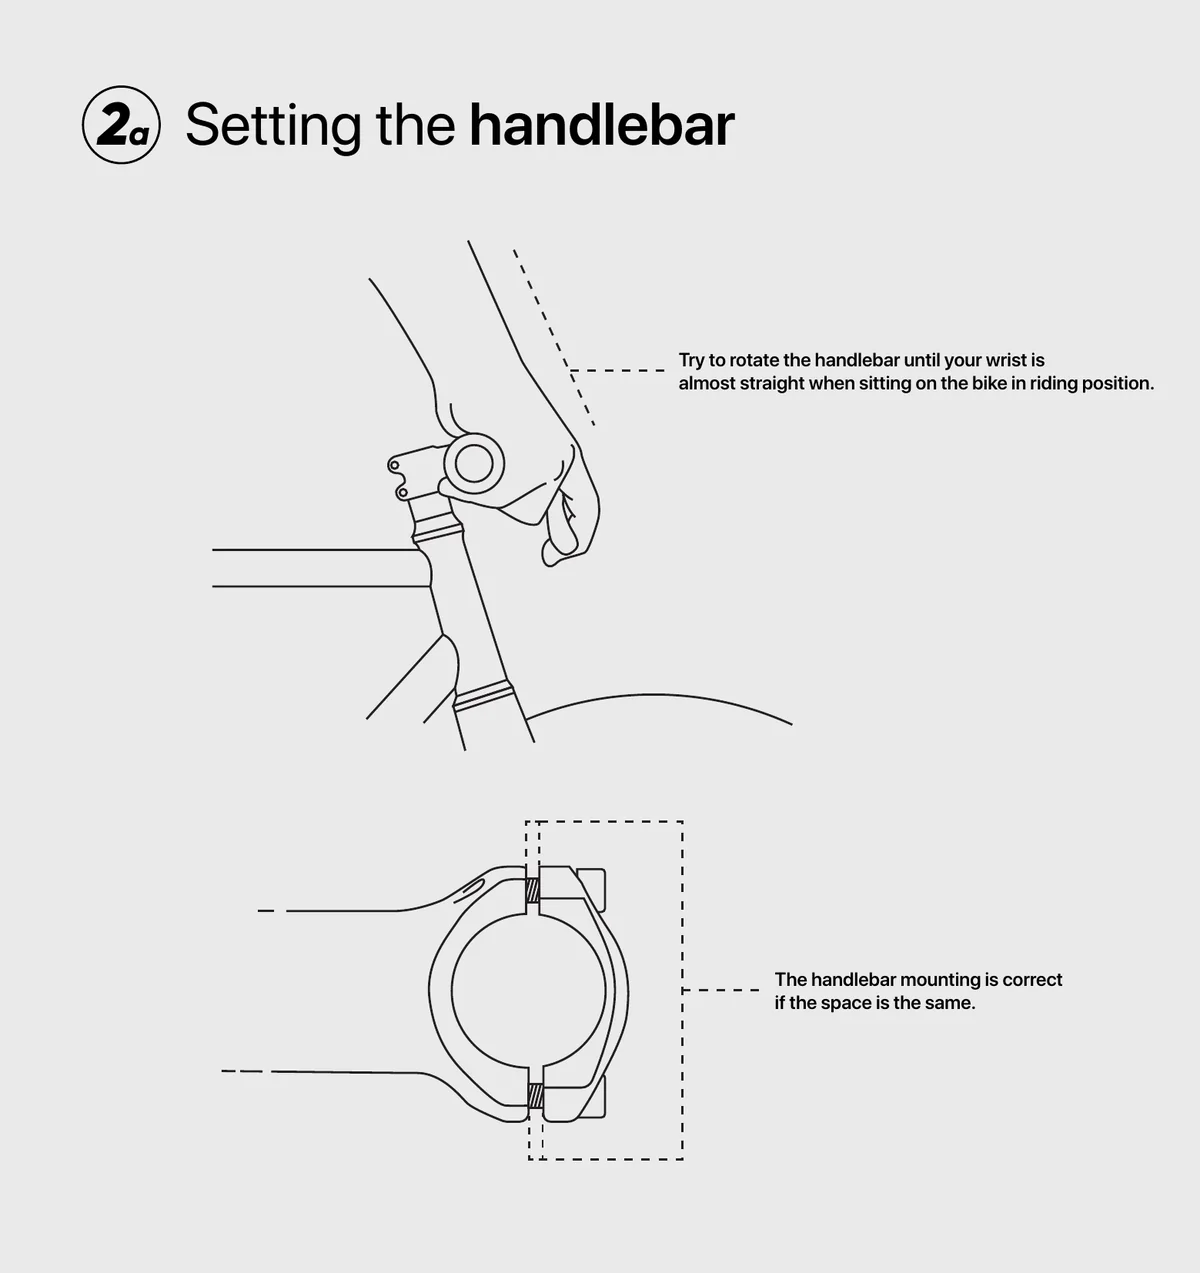
- Sit on the bike in your natural riding position.
- Rotate the handlebar until your wrist is almost straight.
- Check that the spacing in the handlebar clamp is even.
- Re-check that all handlebar clamp bolts are tightened evenly.
The handlebar position is correct when your wrists feel neutral and the clamp spacing is even.
4. Position the front light
Section titled “4. Position the front light”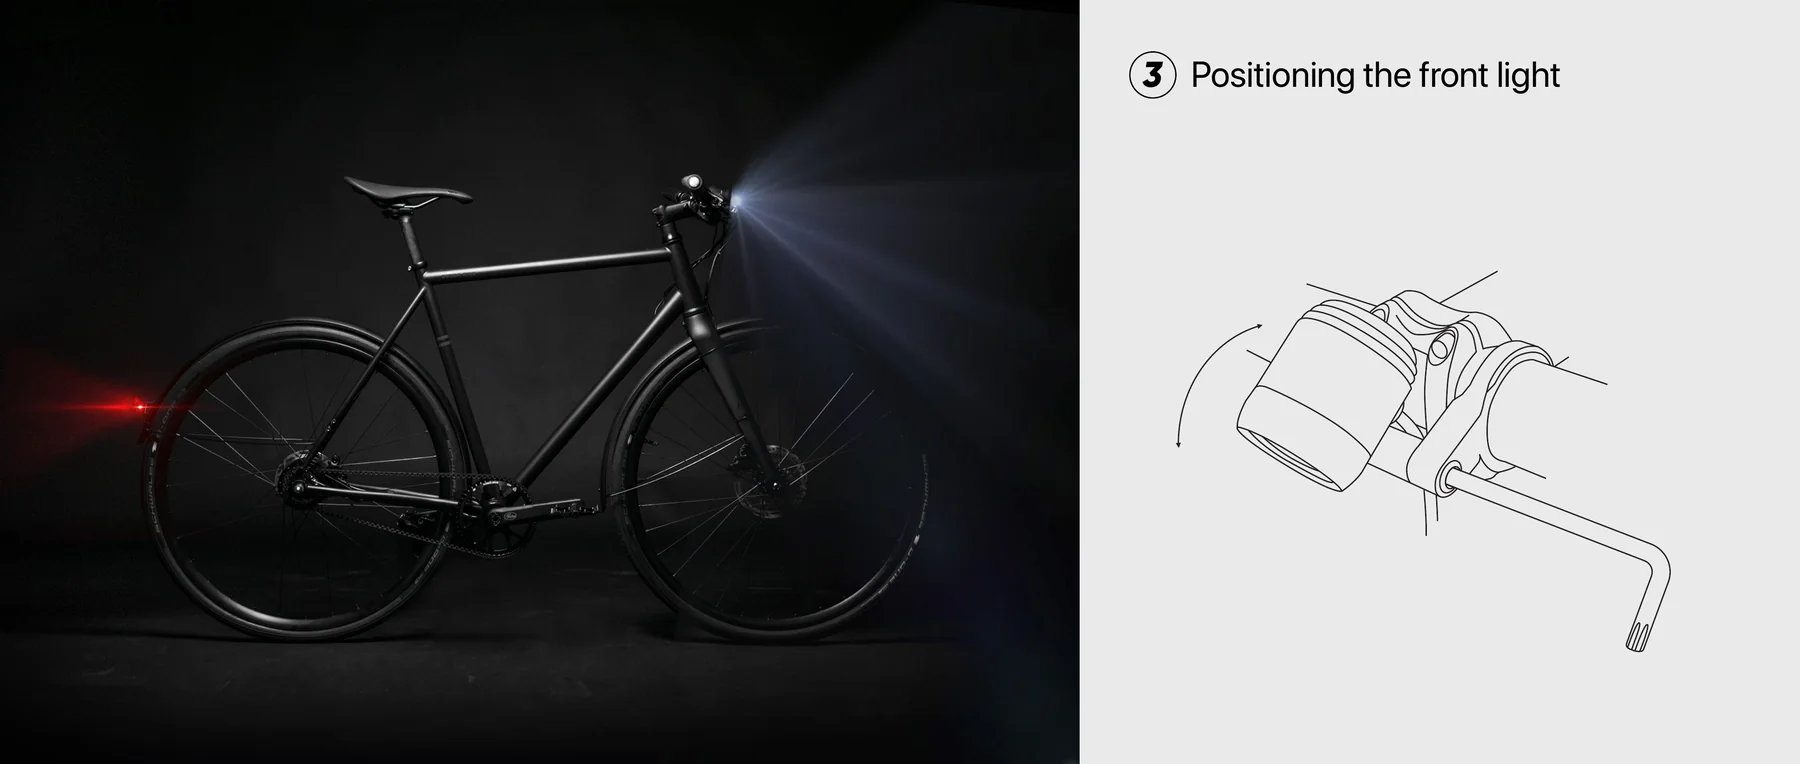
- Aim the front light so it illuminates the road ahead.
- Make sure the light does not shine directly into other people’s eyes.
- Tighten the light mount with a T25 Torx key.
5. Install the pedals
Section titled “5. Install the pedals”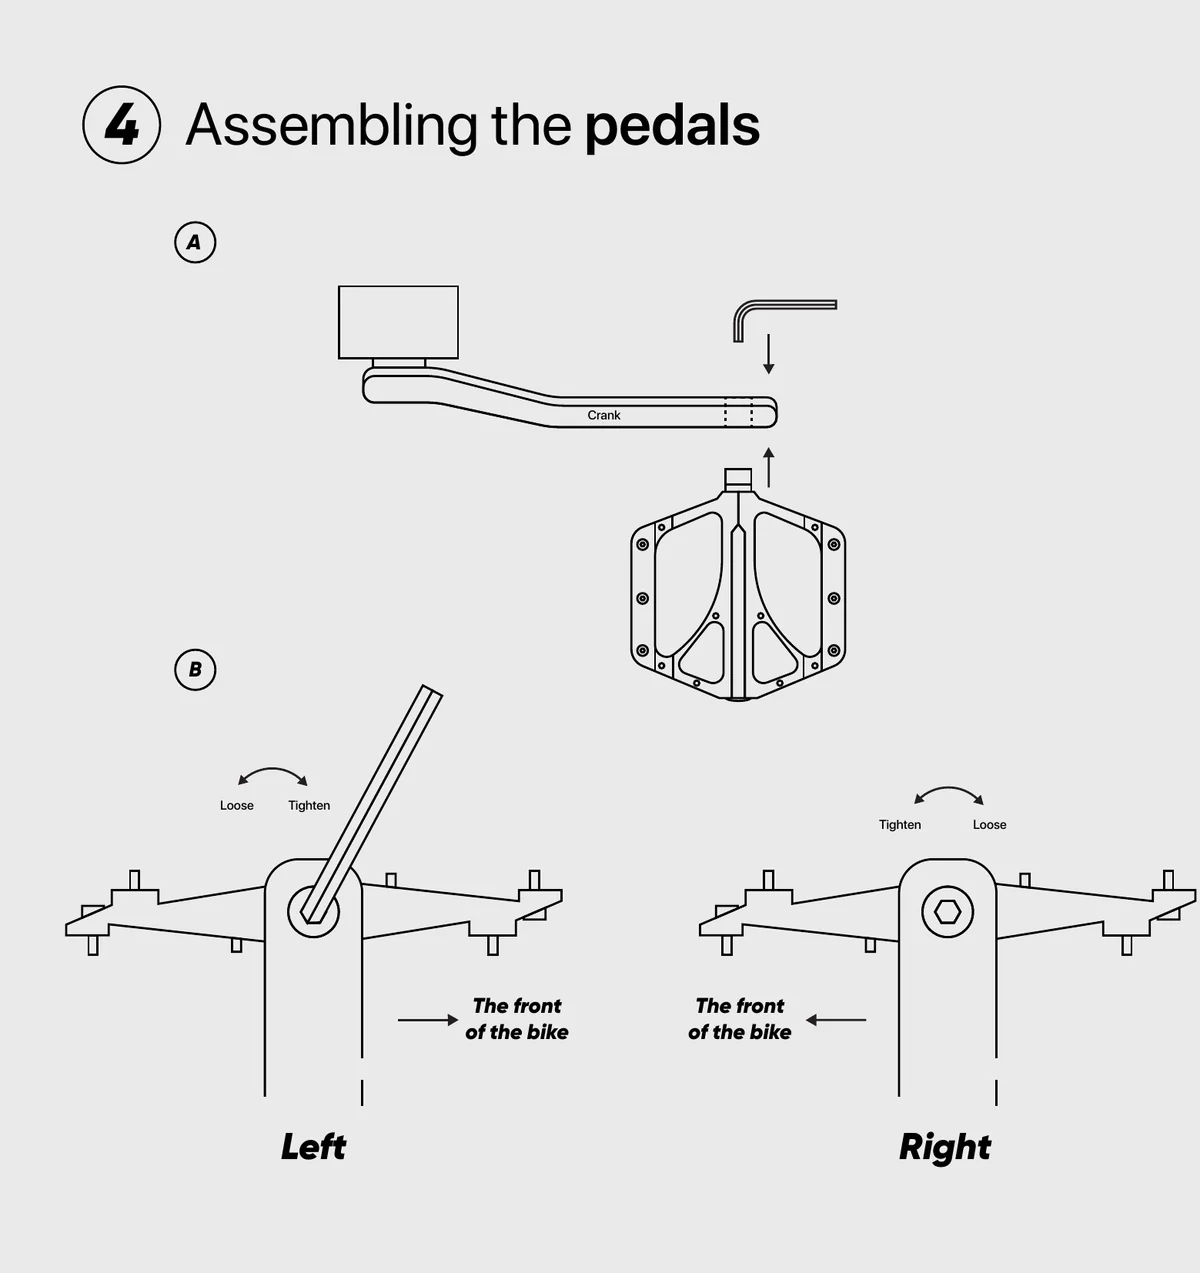
- Identify the left and right pedals.
- Start threading each pedal by hand.
- Tighten the pedals with a 6 mm Allen key.
Torque: 20-30 Nm
6. Install the front mudguard, if included
Section titled “6. Install the front mudguard, if included”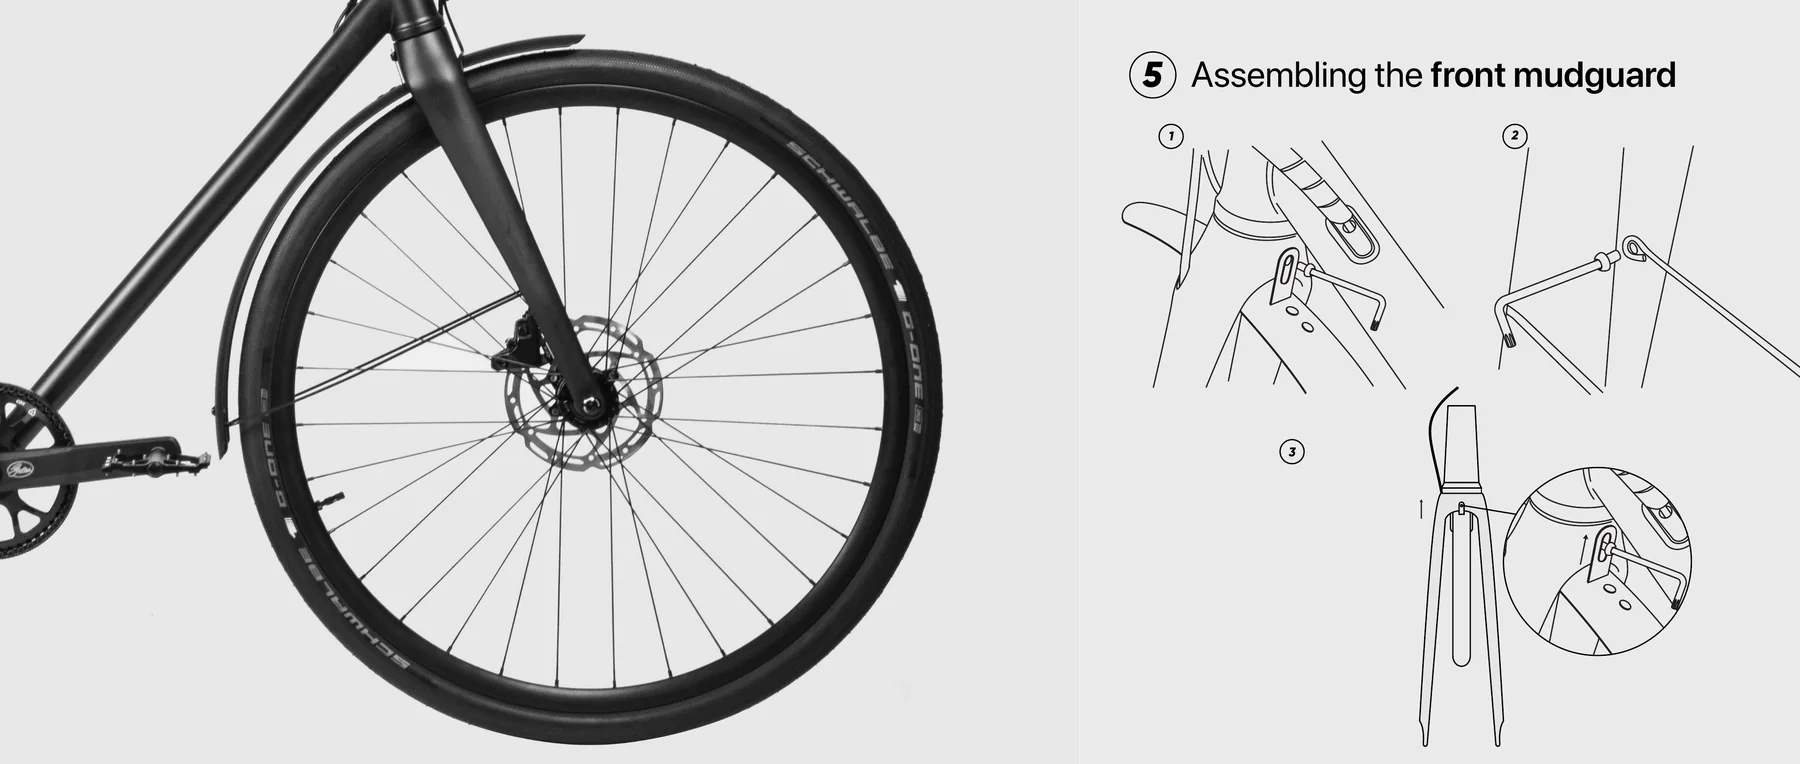
- Position the front mudguard with the top center bolt.
- Insert the bolt into the upper middle hole of the fork.
- Fasten the mudguard stays into the threaded mounts on the inner sides of the fork.
- Make sure the stay bolts are not screwed in at an angle.
- Push the mudguard as high as possible while tightening the middle bolt.
This helps prevent rattling and keeps enough clearance between the tire and the mudguard.
7. Install the front wheel
Section titled “7. Install the front wheel”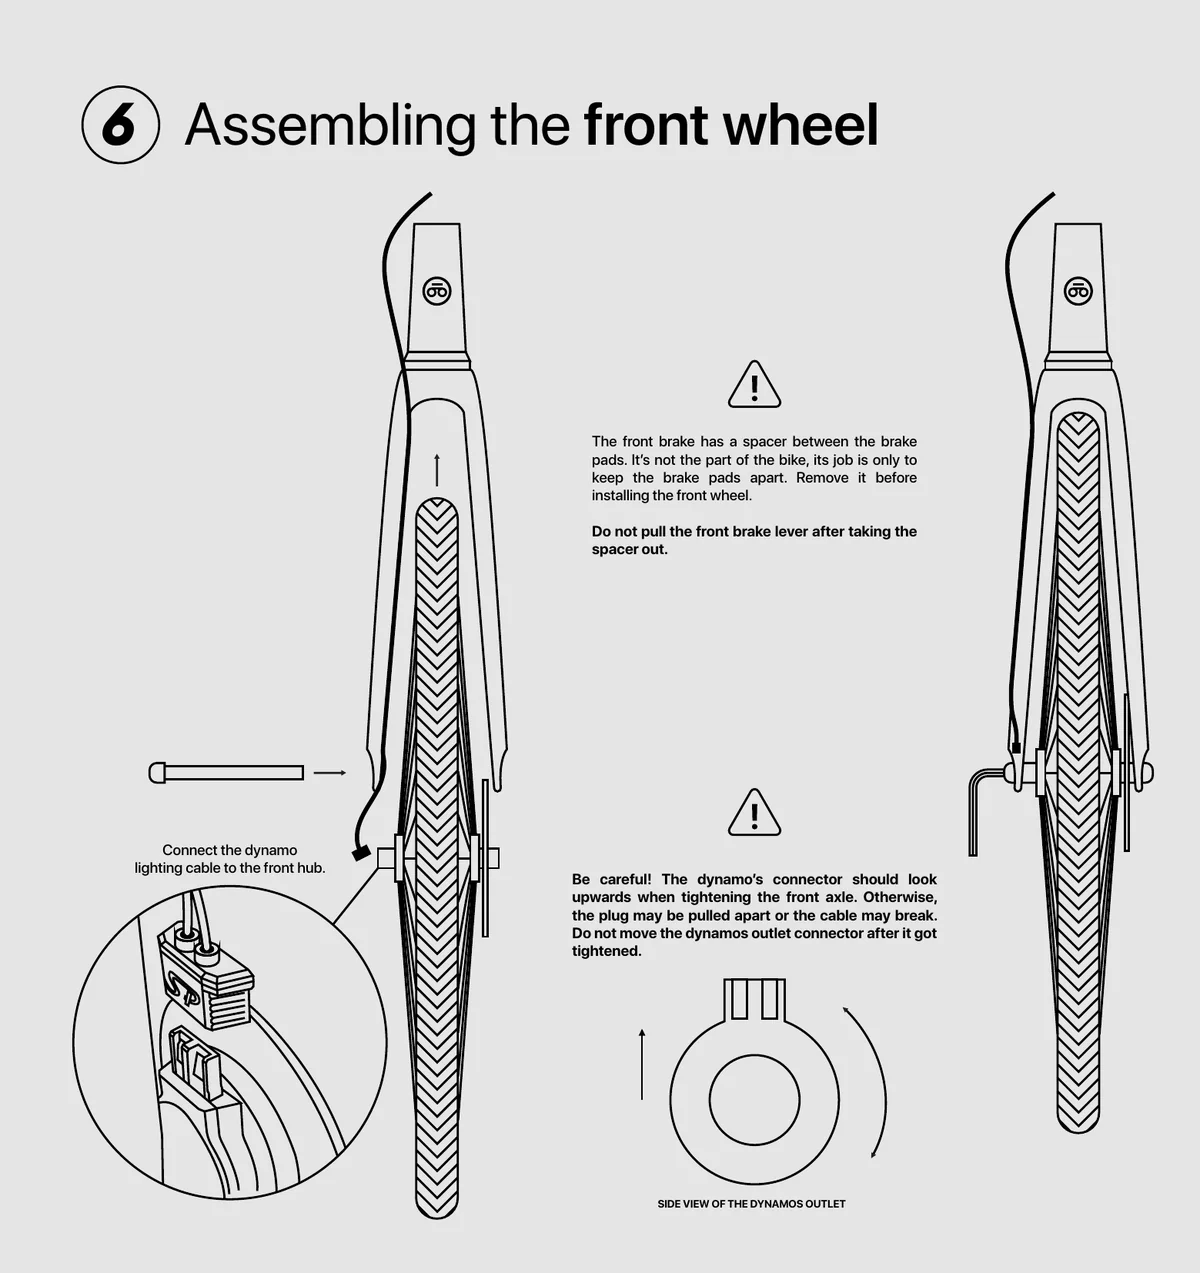
- Remove the spacer from between the front brake pads.
- Do not pull the front brake lever after removing the spacer.
- Place the front wheel into the fork.
- Be careful with the brake rotor. Do not touch the rotor surface.
- Push the axle through the fork and hub from the drive side.
- If your bike has a dynamo hub, position the dynamo outlet connector so it points upward.
- Tighten the front axle.
Front axle torque: 10 Nm
- If your bike has dynamo lighting, connect the front light cable to the dynamo hub.
Final safety check before riding
Section titled “Final safety check before riding”Before the first ride, check that:
- the seatpost is secure and does not rotate
- the handlebar is secure
- the handlebar turns the front wheel correctly
- the front wheel axle is tightened to 10 Nm
- both pedals are fully threaded and tightened
- the brakes work correctly
- the brake rotor does not rub heavily
- the front light works
- the rear light works
- the mudguard does not touch the tire
- no brake, shifter, or light cable is kinked or stretched
After the first rides
Section titled “After the first rides”After the first short rides, check the bike again:
- Check all bolts used during assembly.
- Check that the pedals are still tight.
- Check that the mudguards have not moved.
- Check that the lights still work.
- Check that the brakes feel consistent.
- Check that the belt runs smoothly.
If anything has loosened, stop using the bike until it has been tightened or checked by Booda Bike service.